随着项目越来愈多,服务器也逐渐多起来,不同项目还有 DEV、QA、UAT、PERF 和 PROD … 认真算起来上百的机器了。加上大多数访问还需要 Bastion Server,不仅要查询服务器地址,有些服务器登陆还不能配置SSH证书,导致必须还要多次输入密码,非常非常麻烦。必须要用一些工具,让这个过程轻松起来。
最简单的方法当然是使用客户端App,但是要考虑到安全问题,不要随便尝试。
1. Termius
Termius is the SSH client that works on Desktop and Mobile。
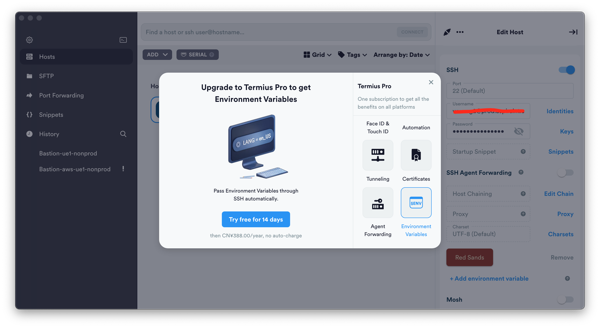
Termius 试用了一下,功能强大,设计也美观简单。不过类似 Bastion 的高功能是需要付费的,而且算得上特别贵了!简单来说,除了贵没有缺点。鉴于我的需求,实属牛刀了,不过手机上倒是可以用用。
2. Royal TSX
Royal TSX 也是一款强大的集成客户端,和 Terminus 差不多,也能很好的支持 Bastion。
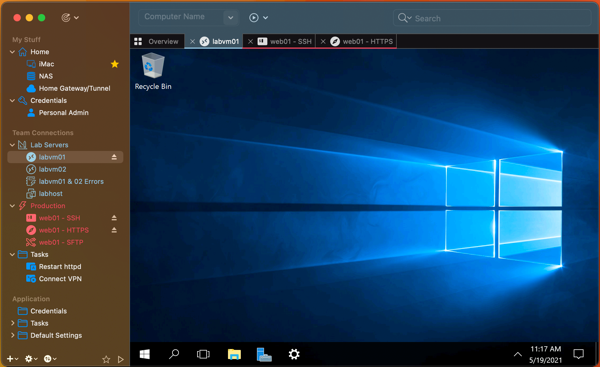
比较起来这两款的话,都满足我 SSH Clients 的需要,Royal 价格也在可以接受的范围,40$ 一次购买。不过 UI 设计真是喜欢不起来 QwQ
3. iTerm2
不想委屈美感,又得省钱,也没有其他出路了,只能继续配置 iTerm2 了。有钱的话到此止步啦 :p
3.1 keep SSH Session Alive
首先我们配置一下 SSH 的连接时间,保持不关闭。
➜  ~ cat ~/.ssh/config
Host *
  ServerAliveInterval 60
  ServerAliveCountMax 180
  TCPKeepAlive no
- ServerAliveInterval : how often (in seconds) your computer is gonna send a null packet to keep the connection alive
- ServerAliveCountMax : how many times will send null packet to keep alive. Thus the total time is ServerAliveInterval plus ServerAliveCountMax.
- TCPKeepAlive : no tells the client to just assume the connection is still good until proven otherwise by a user request, meaning that temporary connection breakages while your ssh term is sitting idle in the background won’t kill the connection.
3.2 Configure Bastion Server
现在把 Bastion 和 Object 服务器的信息保存到 SSH Config 文件里面。
➜  ~ cat ~/.ssh/config

### The Bastion Host
Host bastion-server-alias
  HostName bastion-server-hostname
  User login-user

### The Object Server
Host object-server-alias
  HostName xxx.xxx.xxx.xxx
  User	login-user
  ProxyJump bastion-server-alias
  ProxyCommand ssh bastion-server-alias -W %h:%p
- ProxyCommand directives which tell the SSH client how to connect to a remote server via an intermediary server.
3.3 Configure Passphrase-less SSH key
目前我使用的 Jump Server 无法保留SSH 配置,导致必须使用密码,但是如果有足够权限控制 Bastion Server,那么可以配置 RSA Key,跳过密码输入。
运行下面的脚本,自动生成 Key 并配置到服务器。
#!/usr/bin/env bash

# The hostname of your remote server.
host=myserver.com

# Create this folder if it does not exist: ~/.ssh
mkdir ~/.ssh

# Set the correct permissions (required)
chmod 700 ~/.ssh

# Generate an RSA key pair for identification with the remote server
ssh-keygen -t rsa

# Copy your public key to the remote server
cat ~/.ssh/id_rsa.pub | ssh $host 'cat >> ~/.ssh/authorized_keys'

# ssh is very strict about correct permissions
ssh $host 'chmod g-w,o-w ~; chmod 700 ~/.ssh; chmod 600 ~/.ssh/authorized_keys'
如果不需要去 Bastion Server 配置任何 SSH 相关权限,只是需要自己动手生成 key 的话,直接生成 Key 就好了:
$ ssh-keygen -t rsa -b 2048
Generating public/private rsa key pair.
Enter file in which to save the key (/home/username/.ssh/id_rsa):
Enter passphrase (empty for no passphrase):
Enter same passphrase again:
Your identification has been saved in /home/username/.ssh/id_rsa.
Your public key has been saved in /home/username/.ssh/id_rsa.pub.
3.4 Finally
现在我们可以尝试连接我们的目标服务器了。
ssh object-server-alias
简单多了,不过比起直接使用 GUI 来说,还是要稍微过过脑子,需要记一下服务器的别名。但是能统一所有操作到 iTerm 里面还是非常棒的体验。
对我我的情况,由于权限限制还是需要输入密码。最后还有一个问题是,毕竟有这么多机器,也会出现同时访问多台机器的时候,要保持每台的连结又能快速切换,还要避免开大量窗口 …. 还好我们还有其他工具,比如 Tmux。
4. Tmux
The tmux command is a terminal multiplexer.
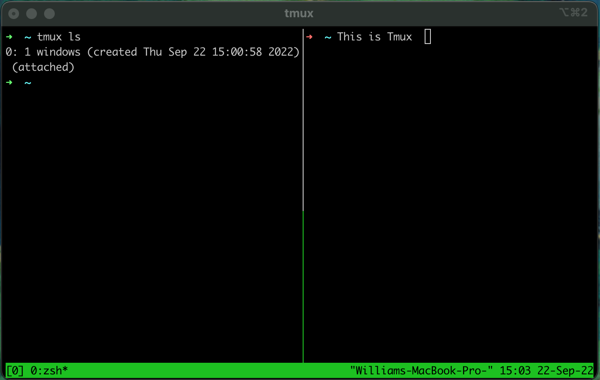
简单说,Tmux 可以作为多窗口管理的工具,更重要的是提供了连接的 Session 管理,让你可以 detach 操作。使用起来也不是太复杂,基本操作如下。
Usages Cheat sheet
Start Session:
tmux
tmux new -s a-meaningful-name
tmux rename-session -t current-name new-name
Panes Commands:
Ctrl-b % # split window horizonal
Ctrl-b " # split window vertical
Ctrl-b <arrow key> # switch with arrow
Ctrl-d # close pane
Ctrl-b z # full screen or shrink back
Windows Commands:
Ctrl-b c # create new
Ctrl-b p  # switch previous
Ctrl-b n # switch next
Ctrl-b <number> # switch with number
Ctrl-b , # rename current window
Session Handling:
Ctrl-b d # detach your current session
Ctrl-b D # detach with a hoice
tmux ls # show current sessions
tmux attach -t 0 # attach “0”which is the first part of your tmux ls output
tmux kill-session -t [session] # kill session
tmux list-sessions | grep -v attached | cut -d: -f1 |  xargs -t -n1 tmux kill-session -t  # kill all sessions
Reference Docs:
- Setting Up an SSH Bastion Host
- SSH to remote hosts through a proxy or bastion with ProxyJump
- How to ssh to a remote server without typing your password
- A Quick and Easy Guide to tmux
- How to Use tmux on Linux (and Why It’s Better Than Screen)
- Tmux Cheat Sheet & Quick Reference
- An Illustrated Guide to SSH Agent Forwarding